

| Overview | Managing Users | |
A Role is a convenient way of grouping similar types of users. Privileges (Privs) can then be applied to each of the roles. Each user can belong to one or more roles. For example, a "Developer" type role might have almost all privileges assigned to it. Whereas, a "Guest" type role may only require read-only access to certain Knowledge Modules, and no access to others. To create new roles right click on 'Roles' in the User Management Console and select 'New Role'.
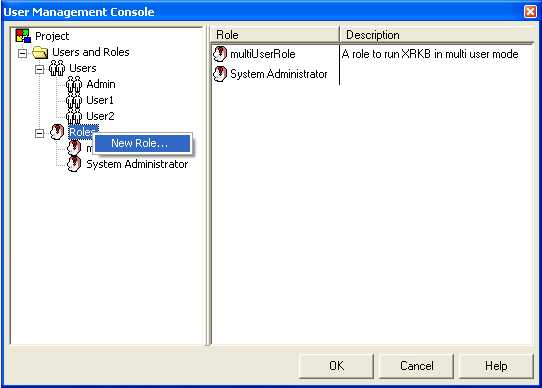
By double clicking the role the privileges assigned to that role can be edited.
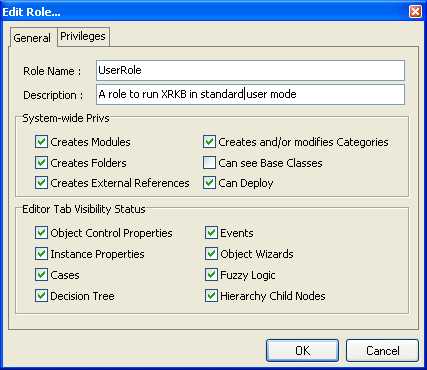
General
Underneath the role name and description edit boxes are a series of check boxes - as shown above. The first group is concerned with turning on/off "system wide" privileges. That is, they affect the project as a whole. For example, you could stop a group of users from creating Folders or you could make Base Classes invisible or you could create a role that can deploy. The next group of check boxes control the visibility of the editor tabs for objects.
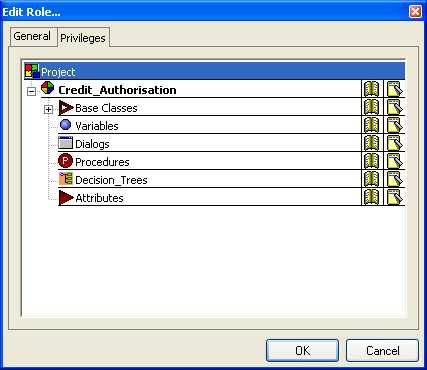
Privileges
The Privileges tab shows a snapshot of the Knowledge Explorer window. Here, privileges can be set on specific items, such as:
· Knowledge Modules
· Folders
· External References
· Base Classes
· Categories
Privileges cannot be set for instances. The left-hand side will show the items that can be set up, the right will display two icons of an open book and a notepad. The open book icon represents the roles read status, and the notepad represents the roles write status. By default, if you click on the read/write status of a Knowledge Module or a Folder, the status will cascade into its children. For example, if you have a Folder with a Knowledge Module inside it, clicking on the icons for the folder will also set the privileges for the Knowledge Module and items within it. Please note that for projects where the number of modules exceeds 100 this bottom section of the dialog is disabled for performance reasons.